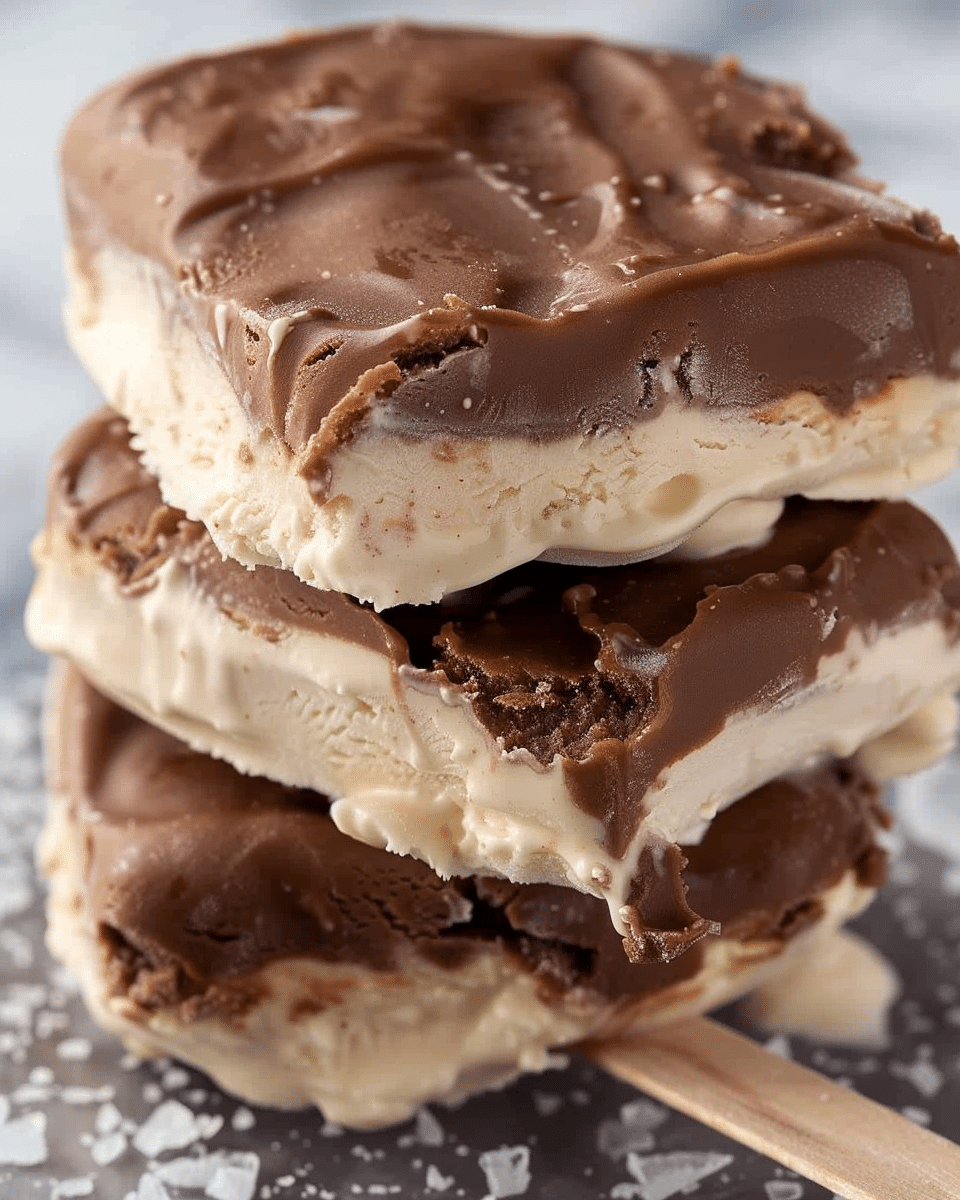
Indulge in the delightful combination of creamy peanut butter and rich chocolate with these Peanut Butter Frozen Yogurt Bars. This no-bake, gluten-free dessert features a lightly sweetened peanut butter and Greek yogurt filling, topped with crunchy salted peanuts, all encased in a crisp chocolate shell. Reminiscent of classic ice cream bars, these treats offer a healthier twist without compromising on flavor.
Why You’ll Love This Recipe
- Homemade Goodness: Crafted with simple, wholesome ingredients, these bars are a superior alternative to store-bought options, ensuring quality and freshness.
- Protein-Packed: The inclusion of Greek yogurt adds a boost of protein, making this dessert both satisfying and nourishing.
- Classic Flavor Pairing: The timeless combination of peanut butter and chocolate delivers a rich and indulgent taste experience.
- No-Bake Convenience: Perfect for warm days or when you’re short on time, this recipe requires no baking, keeping your kitchen cool and your prep simple.
Ingredients
- 1 cup plain Greek yogurt
- ½ cup creamy peanut butter
- 1 tablespoon maple syrup or honey
- 1 teaspoon vanilla extract
- 2 tablespoons roasted and salted peanuts (optional)
- 1 cup chocolate chips or chopped chocolate (6 oz.)
- 2 tablespoons coconut oil
- Popsicle sticks
- Wax paper or silicone baking mat
(Tip: You’ll find the full list of ingredients and measurements in the recipe card below.)
Directions
- Prepare the Baking Sheet: Line a baking sheet with wax paper or a silicone baking mat.
- Mix the Filling: In a small bowl, combine the Greek yogurt, peanut butter, maple syrup (or honey), and vanilla extract. Stir until the mixture is smooth and well-blended.
- Form the Bars: Using a cupcake or ice cream scoop, place half of the yogurt mixture onto the prepared baking sheet, creating 4-6 mounds. Press a popsicle stick into each mound, then top with the remaining yogurt mixture, covering the sticks. Use a small offset spatula to slightly flatten the mounds into bar shapes.
- Add Peanuts (Optional): Sprinkle the tops of the bars with the roasted and salted peanuts, pressing them gently into the surface.
- Freeze: Place the baking sheet in the freezer for about 2 hours, or until the bars are firm and fully frozen.
- Prepare the Chocolate Coating: In a microwave-safe bowl, combine the chocolate chips and coconut oil. Microwave in 30-second intervals, stirring after each, until the mixture is completely melted and smooth.
- Coat the Bars: Remove the frozen bars from the freezer. Working quickly, dip each bar into the melted chocolate, ensuring it is fully coated. Allow any excess chocolate to drip off before placing the bar back onto the lined baking sheet.
- Final Freeze: Return the chocolate-coated bars to the freezer for about 15 minutes, or until the chocolate has hardened.
- Serve: Once the chocolate is set, the bars are ready to enjoy. Store any leftovers in an airtight container in the freezer.
Servings and Timing
- Servings: This recipe yields 4-6 bars, depending on the size.
- Preparation Time: 15 minutes
- Freezing Time: Approximately 2 hours and 15 minutes
- Total Time: About 2 hours and 30 minutes
Variations
- Nut Butter Alternatives: Substitute the peanut butter with almond butter, cashew butter, or sunflower seed butter for a different flavor profile or to accommodate nut allergies.
- Sweetener Options: Use agave nectar or a sugar-free syrup in place of honey or maple syrup to adjust the sweetness to your preference.
- Chocolate Choices: Experiment with dark, milk, or white chocolate for the coating, or use a combination to create a marbled effect.
- Additional Toppings: Before the chocolate sets, sprinkle the bars with shredded coconut, crushed nuts, or a drizzle of caramel for added texture and flavor.
Storage/Reheating
- Storage: Place the frozen yogurt bars in an airtight container, separating layers with parchment paper to prevent sticking. Store in the freezer for up to 2 weeks.
- Serving: When ready to enjoy, remove the bars from the freezer and let them sit at room temperature for a few minutes to soften slightly before eating.
FAQs
Can I use flavored Greek yogurt?
Yes, flavored Greek yogurt can be used to add extra sweetness or complementary flavors. Keep in mind that this may increase the overall sugar content of the bars.
Is there a substitute for coconut oil in the chocolate coating?
You can use vegetable oil or butter as a substitute for coconut oil to achieve a smooth and glossy chocolate coating.
How can I make the bars dairy-free?
To make the bars dairy-free, use a plant-based yogurt and dairy-free chocolate chips. Ensure that all other ingredients, such as the nut butter, are also free from dairy.
Can I add mix-ins to the yogurt filling?
Absolutely! Feel free to fold in mini chocolate chips, chopped nuts, or dried fruit into the yogurt mixture before forming the bars for added texture and flavor.
What if I don’t have popsicle sticks?
If you don’t have popsicle sticks, you can form the yogurt mixture into bite-sized balls or use small silicone molds to create different shapes. Once frozen, these can be dipped in chocolate as directed.
Print
Peanut Butter Frozen Yogurt Bars
- Prep Time: 10 minutes
- Cook Time: 45-50 minutes
- Total Time: 1 hour
- Yield: 18 truffles
- Category: Dessert, Healthy Snacks
- Method: No-Bake
- Cuisine: Vegan, Gluten-Free
Description
Chickpea Truffles are a rich, creamy, and healthier alternative to traditional chocolate truffles. Made with just three simple ingredients, these vegan and gluten-free treats are packed with protein, naturally sweetened, and perfect for guilt-free indulgence.
Ingredients
- 1 can (13.5 oz) chickpeas, drained and rinsed
- ½ cup nut or seed butter (almond, cashew, sunflower seed, or granola butter)
- 1 cup dark chocolate chips, melted
- 1 cup additional dark chocolate chips (for coating)
- 1 tbsp coconut oil (for coating)
Instructions
- Prepare Chickpeas: Drain and rinse chickpeas thoroughly to remove excess liquid.
- Melt Chocolate: Melt 1 cup of dark chocolate chips in a microwave-safe bowl in 30-second intervals, stirring in between, or use a double boiler.
- Blend Ingredients: In a food processor, blend chickpeas, nut/seed butter, and melted chocolate until smooth. Scrape down the sides to ensure a lump-free consistency.
- Form Truffles: Scoop small portions onto a parchment-lined baking sheet. Freeze for 30 minutes until firm.
- Coat with Chocolate: Melt 1 cup of additional chocolate chips with coconut oil. Roll the chilled truffles into smooth balls, then dip into the melted chocolate to coat.
- Set and Serve: Return coated truffles to the baking sheet and freeze for another 15-20 minutes. Enjoy once set.
Notes
- Flavor Enhancements: Add vanilla extract, sea salt, or cinnamon for extra depth.
- Nut-Free Option: Use sunflower seed butter instead of nut butter.
- Sugar-Free Option: Use sugar-free chocolate chips for a lower-carb treat.
- Storage: Keep in an airtight container in the fridge for up to 7-10 days or freeze for up to 2 months.


Your email address will not be published. Required fields are marked *