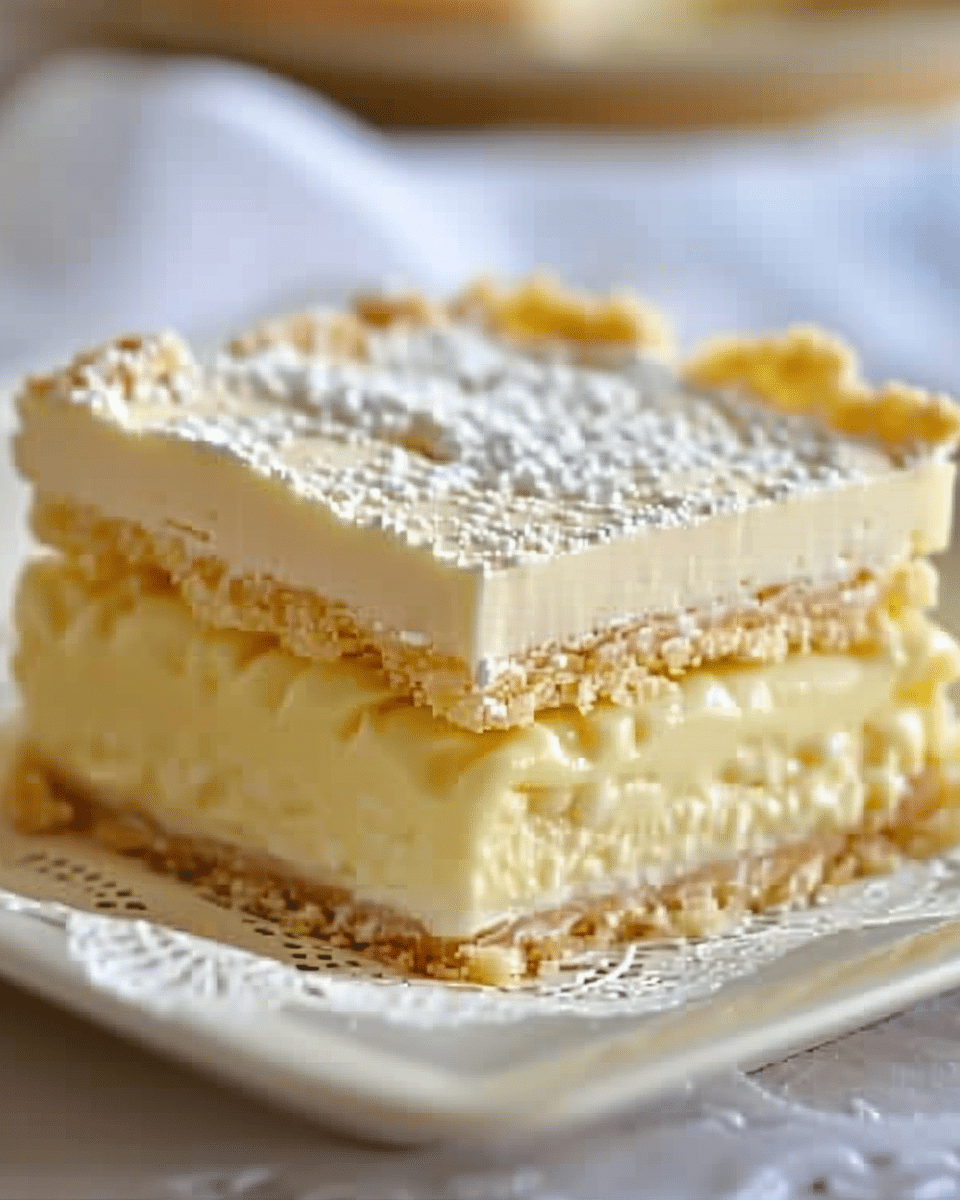
The No-Bake Custard Cream Slice is a deliciously creamy and easy-to-make dessert that requires no oven time. With layers of buttery biscuits, smooth custard filling, and a luscious cream topping, this dessert is perfect for any occasion. Whether you’re hosting a party or just craving something sweet, this custard slice is sure to satisfy.
Why You’ll Love This Recipe
- No Baking Required – Perfect for hot days when you don’t want to turn on the oven.
- Simple Ingredients – Uses pantry staples that are easy to find.
- Creamy & Delicious – The silky custard pairs beautifully with the biscuit layers.
- Great for Make-Ahead – This dessert tastes even better after chilling overnight.
Ingredients
(Tip: You’ll find the full list of ingredients and measurements in the recipe card below.)
For the Base:
- 250g digestive biscuits or graham crackers
- 100g unsalted butter, melted
For the Custard Layer:
- 500ml milk
- 3 tbsp custard powder
- 4 tbsp sugar
- 1 tsp vanilla extract
For the Cream Layer:
- 250ml heavy cream
- 2 tbsp powdered sugar
- 1 tsp vanilla extract
For Garnishing:
- Grated chocolate or cocoa powder (optional)
Directions
1. Prepare the Base
- Crush the digestive biscuits into fine crumbs using a food processor or rolling pin.
- Mix the crumbs with melted butter until well combined.
- Press the mixture firmly into a lined baking dish and refrigerate while preparing the custard.
2. Make the Custard Layer
- In a saucepan, mix custard powder and sugar with a small amount of milk to form a smooth paste.
- Add the remaining milk and heat over medium flame, stirring continuously until thickened.
- Remove from heat and stir in vanilla extract.
- Let the custard cool slightly before spreading it evenly over the biscuit base.
- Refrigerate for at least 1 hour to set.
3. Prepare the Cream Layer
- Whip the heavy cream, powdered sugar, and vanilla extract until soft peaks form.
- Spread the whipped cream over the set custard layer.
4. Final Touches
- Sprinkle grated chocolate or a dusting of cocoa powder on top.
- Chill for at least 2 hours (or overnight) before slicing and serving.
Servings and Timing
- Servings: 8 slices
- Prep Time: 15 minutes
- Chill Time: 2-3 hours
- Total Time: Approximately 3 hours
Variations
- Chocolate Version: Add melted chocolate to the custard for a rich chocolate layer.
- Fruit Layer: Add a layer of fresh sliced strawberries or bananas between the custard and cream.
- Nutty Twist: Sprinkle crushed nuts like almonds or pistachios on top for added crunch.
- Dairy-Free: Use almond or coconut milk and dairy-free whipped topping.
Storage/Reheating
- Storage: Keep in an airtight container in the refrigerator for up to 3 days.
- Freezing: Not recommended as the custard may separate upon thawing.
FAQs
Can I use store-bought custard instead of making it from scratch?
Yes, you can use pre-made custard to save time, but homemade custard has a richer taste.
What biscuits work best for the base?
Digestive biscuits, graham crackers, or shortbread cookies work well.
Can I make this dessert a day in advance?
Yes! Chilling overnight allows the flavors to blend beautifully.
How do I prevent the custard from becoming lumpy?
Stir continuously while cooking and use a whisk to break up any lumps.
Can I add gelatin to make the custard firmer?
Yes, dissolve 1 tsp of gelatin in warm milk before adding to the custard mixture.
Can I make this in individual portions?
Yes, layer the ingredients in small dessert cups for an elegant serving option.
Is there an alternative to whipped cream for the topping?
You can use mascarpone cheese or a cream cheese frosting for a richer texture.
How long does this dessert need to chill?
At least 2-3 hours, but overnight is best for perfect slicing.
Can I use cornstarch instead of custard powder?
Yes, replace it with an equal amount of cornstarch and add extra vanilla for flavor.
Can I make this gluten-free?
Yes, just use gluten-free biscuits for the base.
Conclusion
The No-Bake Custard Cream Slice is a simple yet indulgent dessert that’s perfect for any occasion. With its creamy custard filling, buttery biscuit base, and light whipped topping, it’s a guaranteed crowd-pleaser. Whether you’re making it for a family gathering or just to treat yourself, this effortless recipe is sure to become a favorite. Enjoy!
Print
No-Bake Custard Cream Slice
- Author: Emma
- Prep Time: 15 minutes
- Cook Time: 2-3 hours
- Total Time: 3 hours
- Yield: 8 slices
- Category: Dessert, No-Bake Treats
- Method: No-Bake
- Cuisine: International
- Diet: Vegetarian
Description
This No-Bake Custard Cream Slice is a creamy, indulgent, and easy-to-make dessert with layers of buttery biscuits, smooth custard, and whipped cream. Perfect for any occasion, this no-bake treat requires simple ingredients and comes together effortlessly.
Ingredients
For the Base:
- 250g digestive biscuits (or graham crackers)
- 100g unsalted butter, melted
For the Custard Layer:
- 500ml milk
- 3 tbsp custard powder
- 4 tbsp sugar
- 1 tsp vanilla extract
For the Cream Layer:
- 250ml heavy cream
- 2 tbsp powdered sugar
- 1 tsp vanilla extract
For Garnishing:
- Grated chocolate or cocoa powder (optional)
Instructions
1. Prepare the Base:
- Crush digestive biscuits into fine crumbs using a food processor or rolling pin.
- Mix with melted butter until well combined.
- Press into a lined baking dish and refrigerate while preparing the custard.
2. Make the Custard Layer:
- In a saucepan, whisk custard powder and sugar with a little milk to form a smooth paste.
- Add the remaining milk and heat over medium, stirring constantly, until thickened.
- Remove from heat and stir in vanilla extract.
- Let the custard cool slightly, then spread evenly over the biscuit base.
- Refrigerate for at least 1 hour to set.
3. Prepare the Cream Layer:
- Whip heavy cream, powdered sugar, and vanilla extract until soft peaks form.
- Spread the whipped cream over the chilled custard layer.
4. Final Touches:
- Sprinkle with grated chocolate or cocoa powder.
- Chill for at least 2 hours (or overnight) before slicing and serving.
Notes
- Chocolate Version: Add melted chocolate to the custard for a chocolate twist.
- Fruit Layer: Add sliced strawberries or bananas between the custard and cream.
- Nutty Crunch: Sprinkle crushed almonds or pistachios on top.
- Dairy-Free: Use coconut or almond milk and a dairy-free whipped topping.


Venture into the epic sandbox of EVE Online. Forge your empire today. Fight alongside hundreds of thousands of explorers worldwide. [url=https://www.eveonline.com/signup?invc=46758c20-63e3-4816-aa0e-f91cff26ade4]Begin your journey[/url]